Core Data basics - Part Two
23 Nov 2022Yesterday I roughed out a master/detail app with a list of gardens, and for each garden a detail screen including some plants. It used arrays of structs for the data. Today I’m going to convert that app to use Core Data, and explain my understanding of each step. This won’t be the entire app - I’m going to include the plants in my data structure, but not actually use them in this version. I’ll save that 1:many relationship stuff for another post.
Once again I need to acknowledge Paul Hudson’s 100 Days of SwiftUI for most of my knowledge of Core Data - much of the code below is lifted directly from his examples. The explanations of what is going on, and any errors, are mine.
Just to remind you, here’s what our working app should look like by the end of this post.
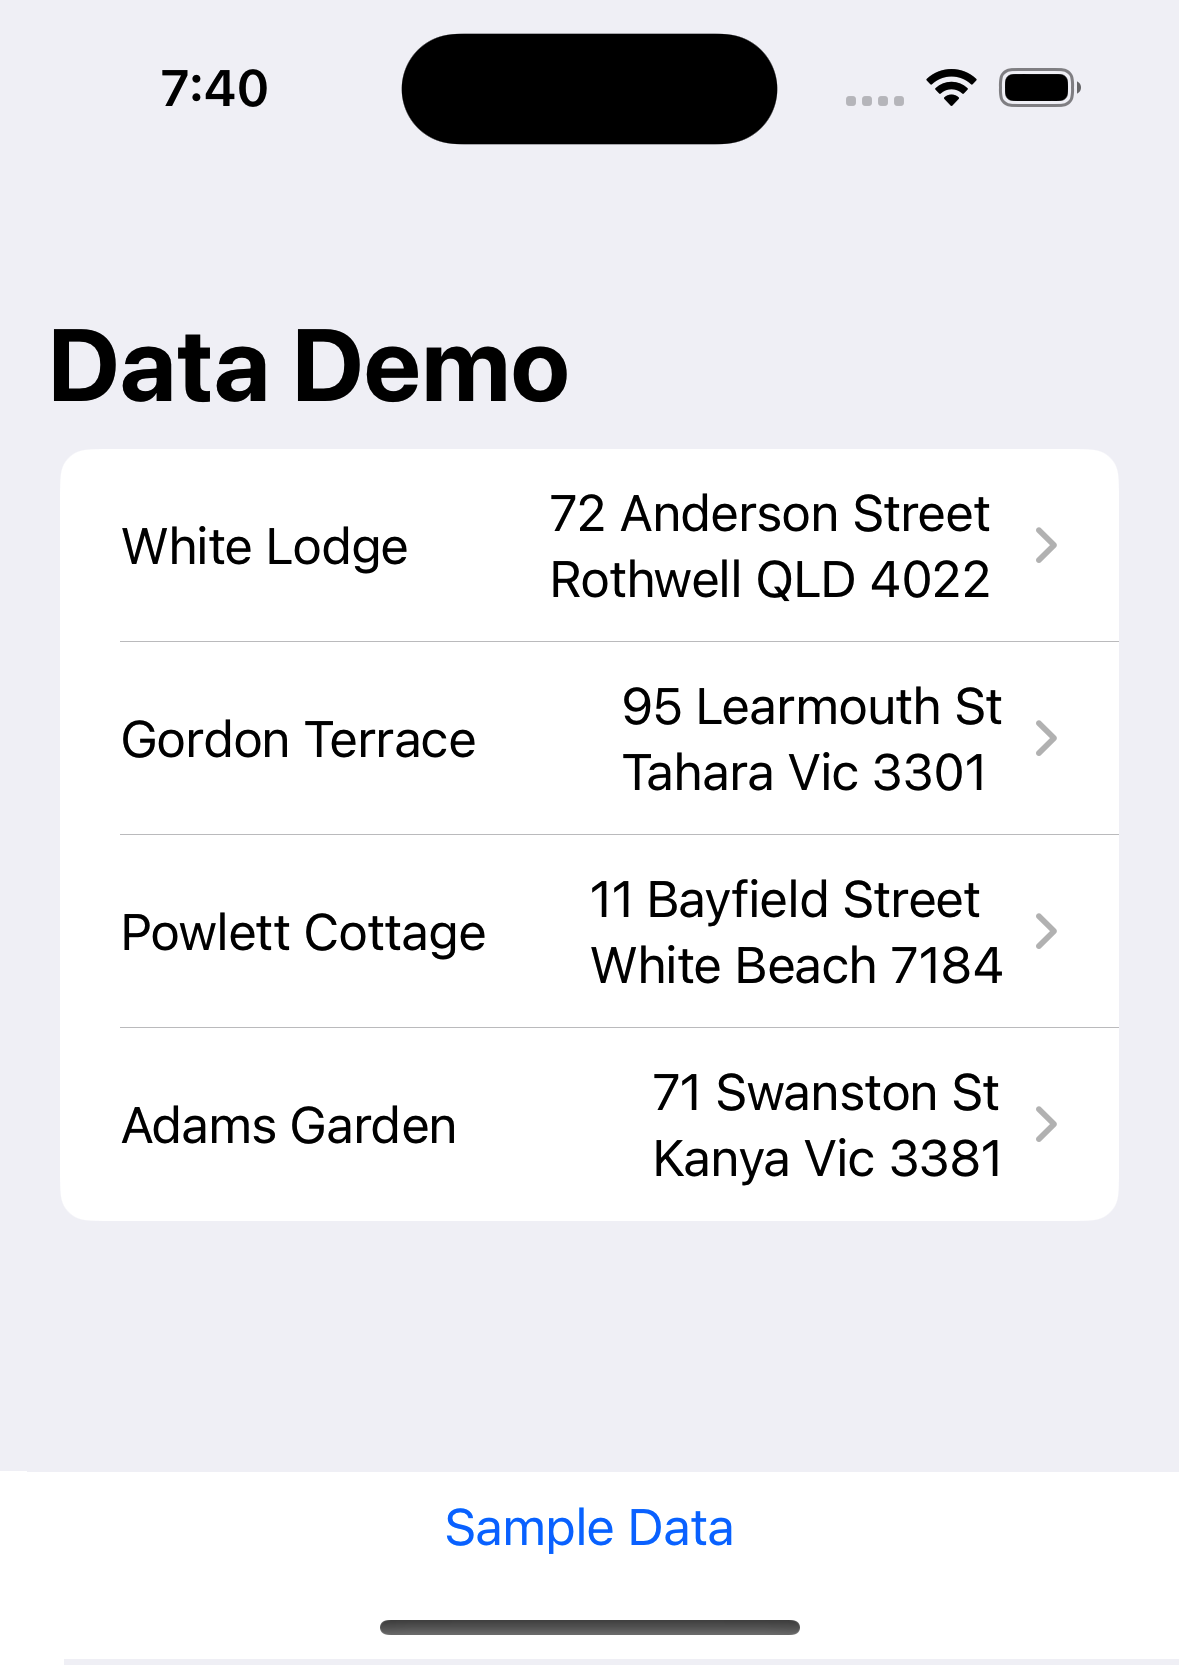
The “Sample Data” button creates the gardens to display. The list above displays them.
The first thing we need to do is to create the data model. This is the description of our data structures - Garden and Plant which in the previous version were structs. In this version they will become classes, but we don’t just write the classes, we define them in an XCode data model.
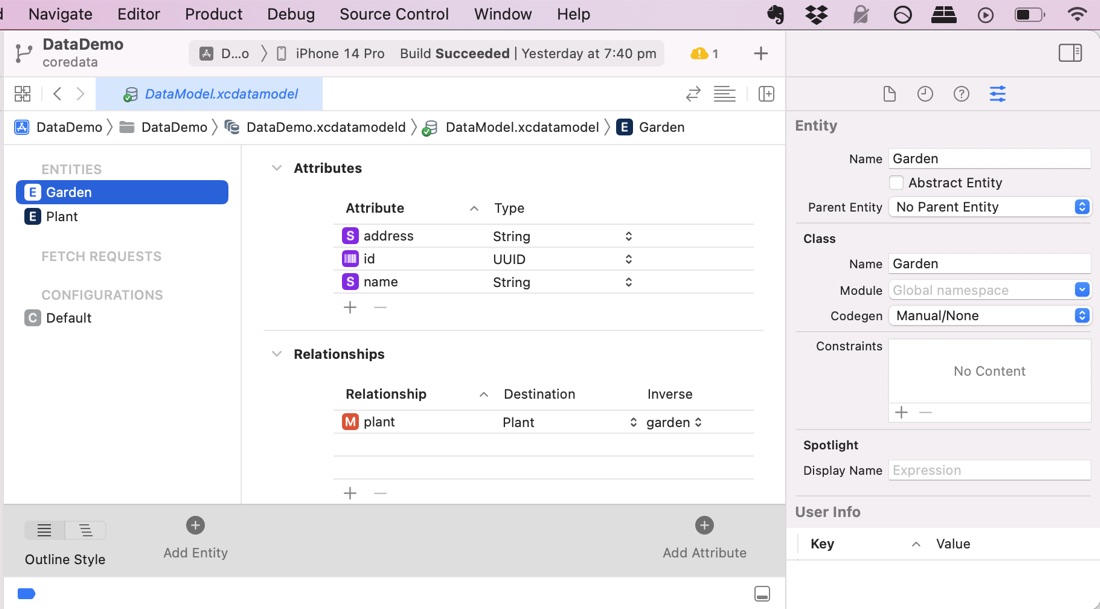
There’s slightly different language. Instead of structs we have Entities for Garden and Plant, and instead of properties they have Attributes.
While we’re editing the data model, there’s another couple of little jobs to do here. We define the relationship between Gardens and Plants (each Garden can have many Plants, each Plant only belongs to a single garden). We also need to turn Codegen to Manual/None. To see this setting, you need to View|Inspectors|Data Model. If it’s left on “Class Generation” XCode creates a secret file in the build folder that contains the class definitions for Garden and Plant. In this app, I want to change them so we need to have them as part of our project source, which is the next step.
We are going to get XCode to explicitly generate the Managed Object code for our entities, and add it to our project so we can edit it - Editor | Create NSManagedObject. Select both entities and XCode will generate four files and add them to the project navigator. – Each entity has a file with an empty class definition, and a file with an extension containing the @NSManaged property definitions and the fetchRequest method.
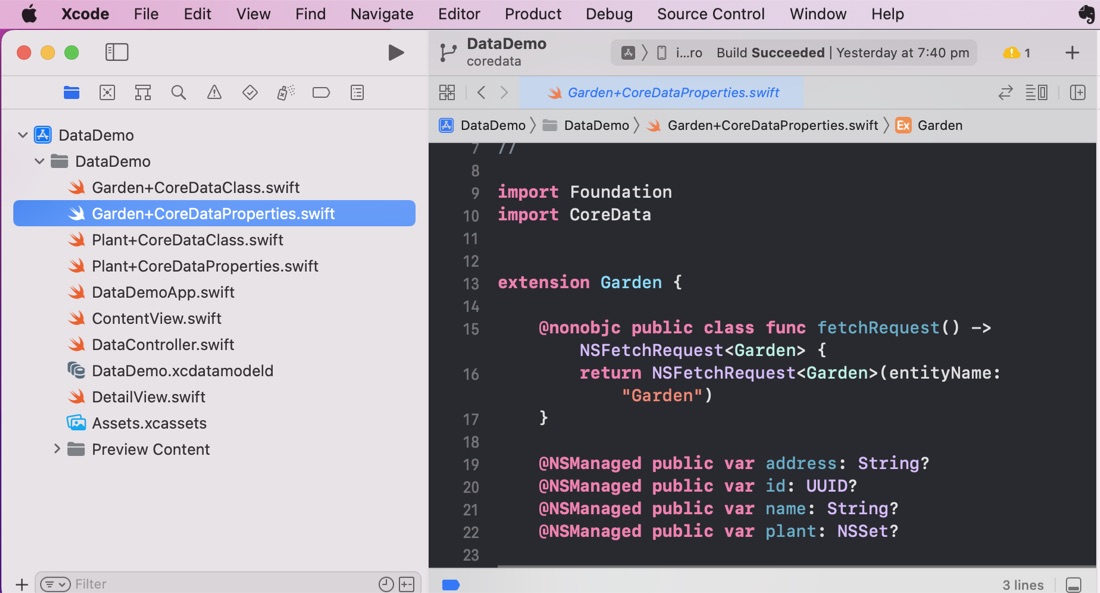
Since the properties are (a slightly different to Swift version of) optionals, this file is a good place to make any computed properties to return safely unwrapped versions.
extension Garden {

    @nonobjc public class func fetchRequest() -> NSFetchRequest<Garden> {
        return NSFetchRequest<Garden>(entityName: "Garden")
    }

    @NSManaged public var address: String?
    @NSManaged public var id: UUID?
    @NSManaged public var name: String?
    @NSManaged public var plant: NSSet?

    var wrappedName: String {
        name ?? "Unknown"
    }
    var wrappedAddress: String {
        address ?? "Unknown"
    }

}
That’s our classes for the individual bits of data - analogous to the structs - taken care of. But what about the analog for the array? What’s our container?
For this, we need an NSPersistentContainer. The way Paul does things, this is a property of a data controller obect. It links to the data model we defined before.
class DataController: ObservableObject {
    let container = NSPersistentContainer(name: "DataDemo")

    init() {
        container.loadPersistentStores { _, error in
            if let error = error {
                print("Core Data failed to load: \(error.localizedDescription)")
            }
        }
    }

    deinit {
    }

}
In the app definition, instantiate the dataController as an @StateObject, then insert its viewcontext into the Environment. The view context is what we’ll use elsewhere in the app to manipulate the data.
@main
struct DataDemoApp: App {
    @StateObject private var dataController = DataController()
    var body: some Scene {
        WindowGroup {
            ContentView()
                .environment(\.managedObjectContext, dataController.container.viewContext)
        }
    }
}
In the view where we want to access our data, extract the managed object context from the environment and express it as a property of the view. Also in the view, we need a property to access our collection of Gardens. This is another property, with the @FetchRequest property wrapper.
struct ContentView: View {
    @Environment(\.managedObjectContext) var moc
    @FetchRequest(sortDescriptors: [
        SortDescriptor(\.name)
    ]) var gardens: FetchedResults<Garden>
To add data - new gardens, instantiate a new garden with the “context:” initialiser and pass in our managed object context – this is the link to all the persistence code – the data model and so on. When you’re ready for these to be committed to “disk” (so far they are in the collection, but only in memory) call the managed object context’s save() method.
Button("Sample Data") {
    let garden1 = Garden(context: moc)
    garden1.name = "White Lodge"
    garden1.address = "72 Anderson Street \nRothwell QLD 4022"
    let garden2 = Garden(context: moc)
    garden2.id = UUID()
    garden2.name = "Gordon Terrace"
    garden2.address = "95 Learmouth St\nTahara Vic 3301"

    try? moc.save()
}
Note that we are dealing with objects now – reference types – so we have to keep creating new objects to add them to the collection. This is contrasted with when I was loading up the sample data with the struct, I could keep recycling it and when I added it to the array each time it was value copied.
To access our data, it’s identical to accessing any collection, except that I’ll use the unwrapped computed properties from earlier.
    @FetchRequest(sortDescriptors: [
        SortDescriptor(\.name)
    ]) var gardens: FetchedResults<Garden>

    var body: some View {
        NavigationView {
            VStack {
                List {
                    ForEach(gardens, id: \.id) {garden in
                        {
                            HStack {
                                Text(garden.wrappedName)
                                Spacer()
                                Text(garden.wrappedAddress)
                            }
                        }
                    }
                }
That’s covered the very basics. Here’s the source for this version . The next step will be to deal with the one-to-many relationship between the gardens and plants.