Getting Started with Ansible
19 July 2023
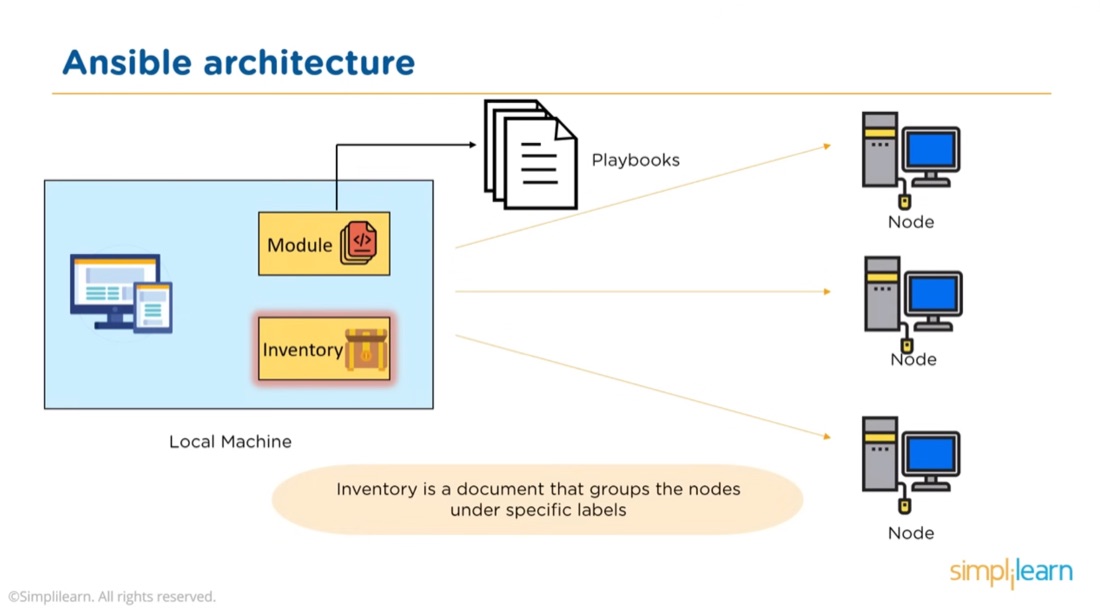
Ansible is a system for executing commands on remote systems. It allows a declarative approach - so if you run a playbook (the system configuration files are called playbooks) that says a system has a Docker container running Jellyfin, Ansible will check if that’s true, and if not, make it so. Ansible is best used when you have a large number of systems to maintain, but even with a small number, it serves to document systems as well as to automate their creation.
Since, with Ansible, system configurations can be completely described, it’s a step in the journey to “infrastructure as code” and allows infrastructure to be version controlled, and lends itself to Git-Ops where you push a change to a playbook file, and it’s executed to make that description of the configuration reality on your servers. The list of servers is stored in a file called the inventory.
I’ve considered implementing it a couple of times, but put it off as soon as I started looking at these complicated yaml files. Jeff Geerling’s “Ansible for DevOps” seemed like the perfect place to start, but then he uses Vagrant and VirtualBox in his early examples, and Vagrant’s integration with Ansible means things are not being done in a standard way and I couldn’t follow along without mirroring his setup. I don’t want to run VM’s on my laptop, I want to use my homelab VMs or a VPS - both of which I think would be a more common setup.
This mini guide is just a start. I’ll step through to the point where you have a yaml file describing a system configuration that can be applied to a VM to install some software. After that, you probably want to buy Jeff’s book, hit up some good v ideos, or head to the Ansible documentation .
Prerequisites
For this to be helpful to you, you probably need to have been mucking about running Linux servers. You know how to ssh into them and have set up key pairs to allow that without typing your password each time. You can write a bash script (but don’t want to), You know how to install software with apt/yum/pip/homebrew etc. You should go and install it now. Note that you also need python (preferably 3) on the host.
If you’ve saved a run book of the things you need to do to recreate particular setups or deal with common issues, then you are at the exact point that Ansible is going to make your life better.
Get Ansible installed , you do need an up to date Python. You also need to have ssh set up for each of the nodes (servers) you are going to manage, preferably including using keys rather than passwords.
Starting Concepts
Ansible can execute playbooks which are yaml files setting out the actions needed or final state of the node to be achieved. Alternatively, single commands can be executed from the command line in ‘ad-hoc mode’. When setting things up, ad-hoc mode is a good starting place to check you’ve installed everything correctly since it’s simpler.
Ansible modules are bits of code to support particular pieces of functionality. You could think of them as code libraries. For example, there’s an apt module that enables Ansible to execute commands related to package management on the Debian family of Linux distros. Similar to code libraries, you’ll need to know which library is needed for the functionality you want to use. Luckily, Ansible’s documentation is excellent, and as with your programming, you’ll soon become familiar with the ones you use all the time.
Demo Environment
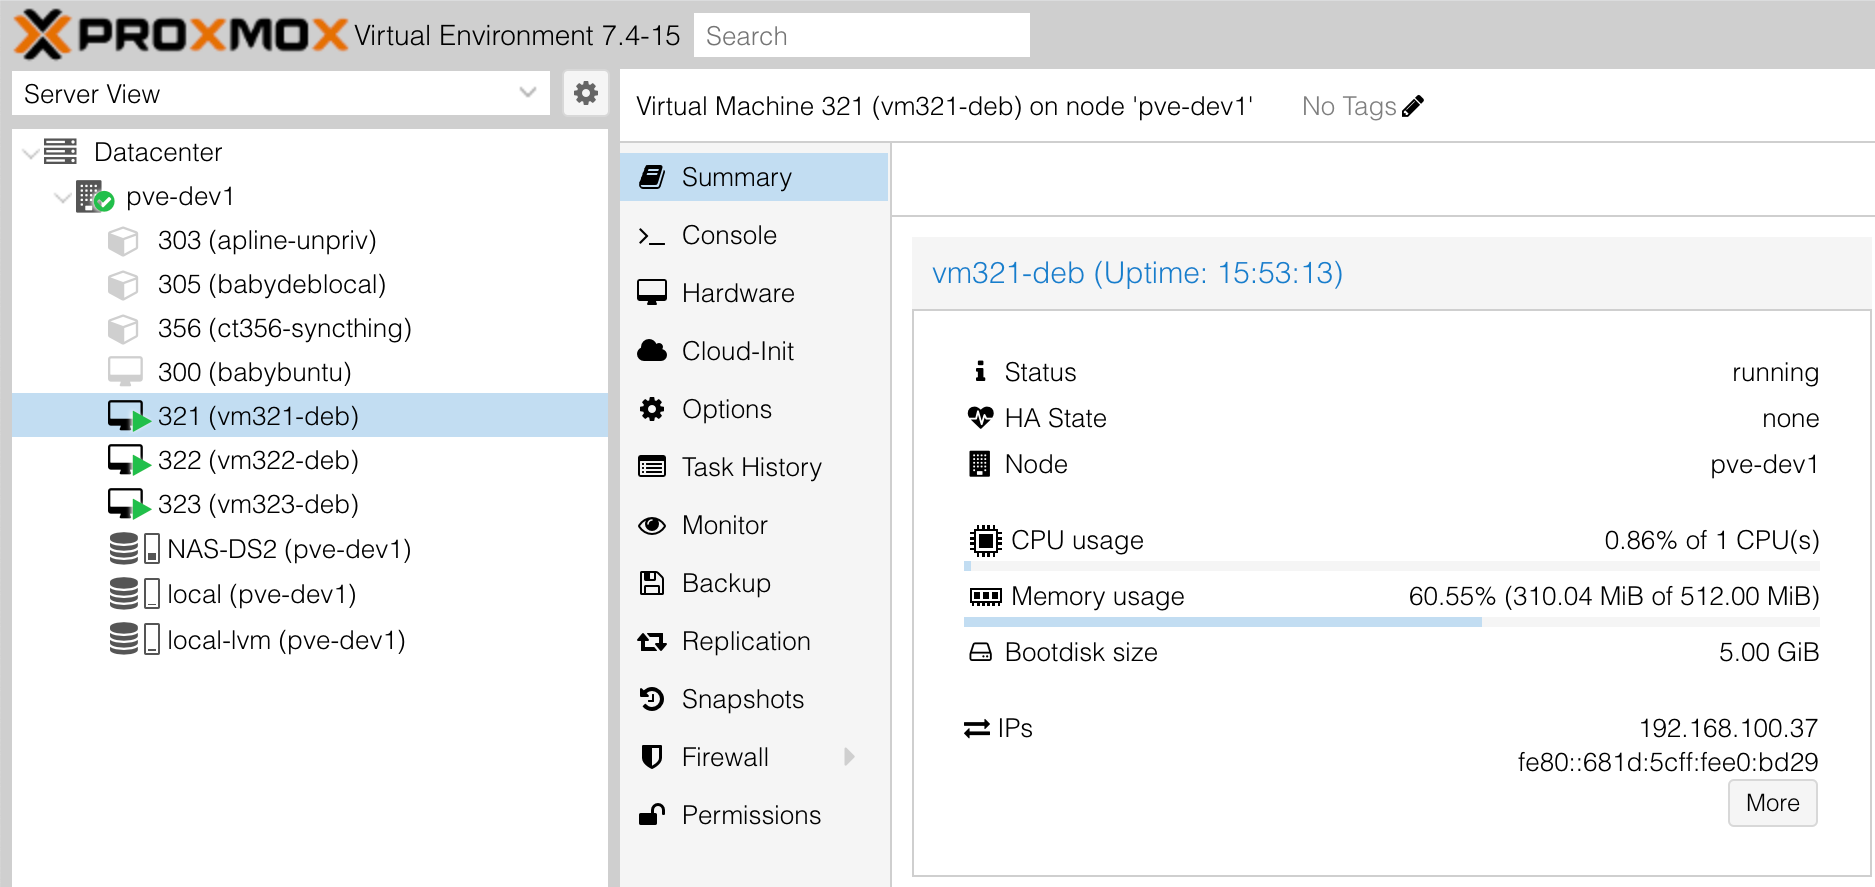
For the following examples, I’ve set up three virtual machines (VM’s) 192.168.100.37 - 192.168.100.39 running Debian. I use Proxmox on my servers, so it looks a bit like this.
If you’re trying things from a single machine, you could install something like VirtualBox to create VM’s, or I’d probably recommend just commissioning a VPS on Linode or Digital Ocean . They both have deals whereby you get a dollar amount credit for signing up, for the minimal machine you need to try these things out, you’re probably looking at a cost of $0.30 an hour. I’m in Australia, so my VPS’s are on Binary Lane which costs less that AUD5 a month for a low-end instance.
If you’re running against multiple machines, you’ll make your life easier by having the same user name on each one. For example, the commands I use to ssh into mine are:
ssh ian@192.168.100.37
ssh ian@192.168.100.38
ssh ian@192.168.100.39
Inventory
Ansible has the concept of an Inventory. The Inventory is a text file of the servers/nodes (I’m just going to say nodes from now on). We need this inventory whether using playbooks or ad-hoc commands. Here’s mine, which I’ve saved in the directory I’m working from as hosts:
192.168.100.37
192.168.100.38
192.168.100.39
Note that these could also be domain names if your nodes are set up on DNS.
First Command
Finally, we’re at the point we can run something. Let’s try this command to find the host name of each node. There’s a lot going on, so we’ll break it down after we’ve looked at the output.
ansible -i hosts all -u ian -a "hostname"

Let’s break down all those arguments:
-i hosts- the inventory flag points to the inventory file. In my example the file is named “hosts”all- we’re saying to execute this against all of the nodes in thehostsfile. Later on we’ll see how to separate the nodes into groups inside the inventory file and this will make more sense.-u ian- the ssh user name for each node-a "hostname"- the command to run
What Ansible has actually done here is ssh into each node and use python to execute the command. Collected the output, then formatted that for us to see. Here it is:
192.168.100.37 | CHANGED | rc=0 >>
vm321-deb
192.168.100.38 | CHANGED | rc=0 >>
vm322-deb
192.168.100.39 | CHANGED | rc=0 >>
vm323-deb
There’s our node IP addresses. The rc=0 is the successful return code, then there’s the actual host names - vm321-deb etc.
But, what’s going on with CHANGED? Ansible always indicates some sort of status - things like CHANGED, SUCCESS, FAILED etc. In this case, there should not have been any change - we were just retrieving the hose names, not altering them. The best answer is just ignore this for now. The long answer is that when we’re using -a to run commands on a node, Ansible’s command module isn’t able to tell if there have been changes or not, so it reports CHANGED as a better safe than sorry approach.
Even though it’s possible to use Ansible to run native commands, when there is an equivalent Ansible module that can carry out the same action, it’s always better to use that. The reason is that that module code is smart enough to see if something needs done or not. If it does not need done, it will just return SUCCESS, if it needs done, it will carry out what’s needed and return CHANGED.
Idempotence
Every Ansible tutorial includes this word, which I have never encountered anywhere else. A command is idempotent if the result is the same no matter how many times it is executed. In the case of Ansible, this is because it checks if something is needed before it does it.
Let’s look at an example. If I wanted to create a test directory in the home folder of each of my machines, the Ansible module for this is the file module. I could use this command:
ansible -i hosts all -u ian -m file -a "path=test state=directory"
The -m tells Ansible with module to use, and our arguments after the -a flag tell Ansible that the state we want to achieve is a directory named test. Let’s run that and have a look at the output:
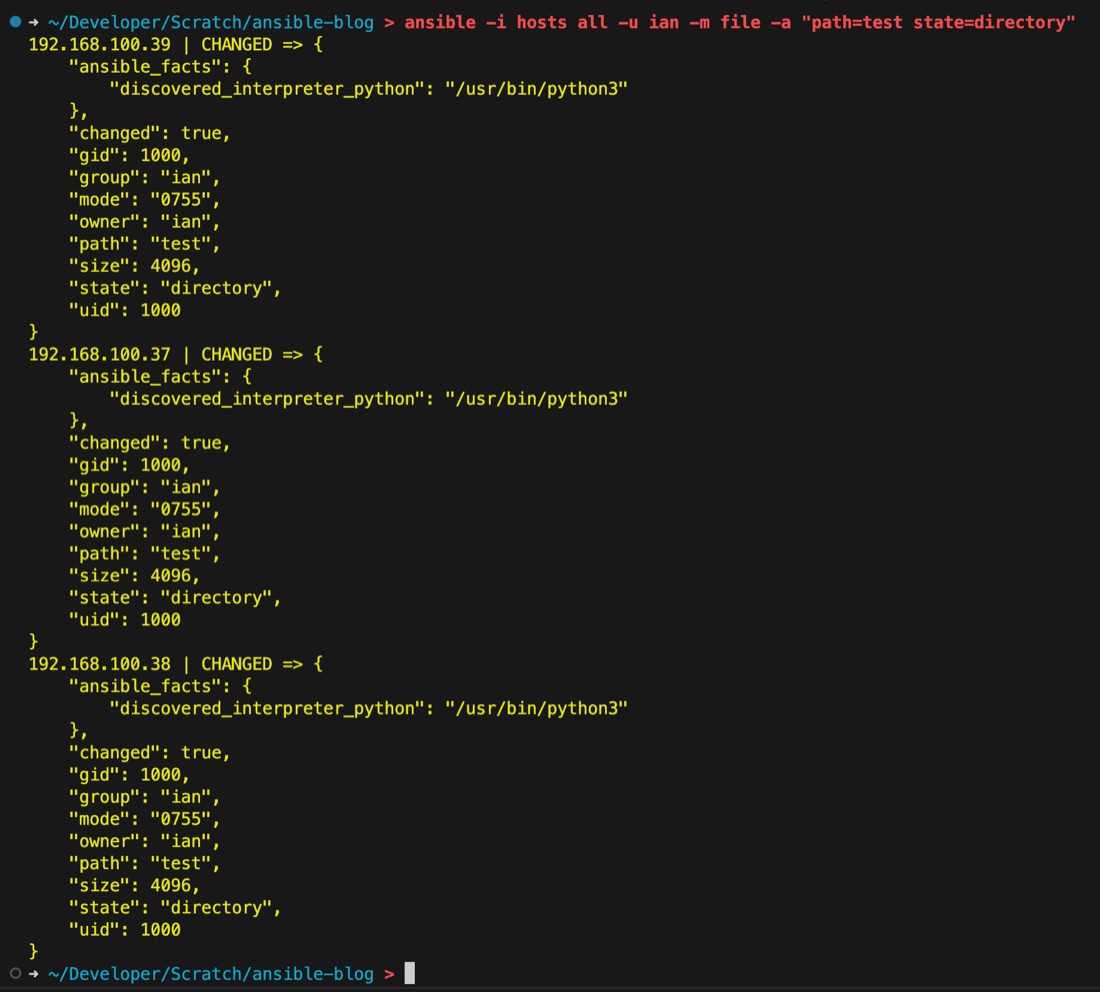
That makes sense, each one is CHANGED because we needed to create the directory. Let’s run it again and see what happens.
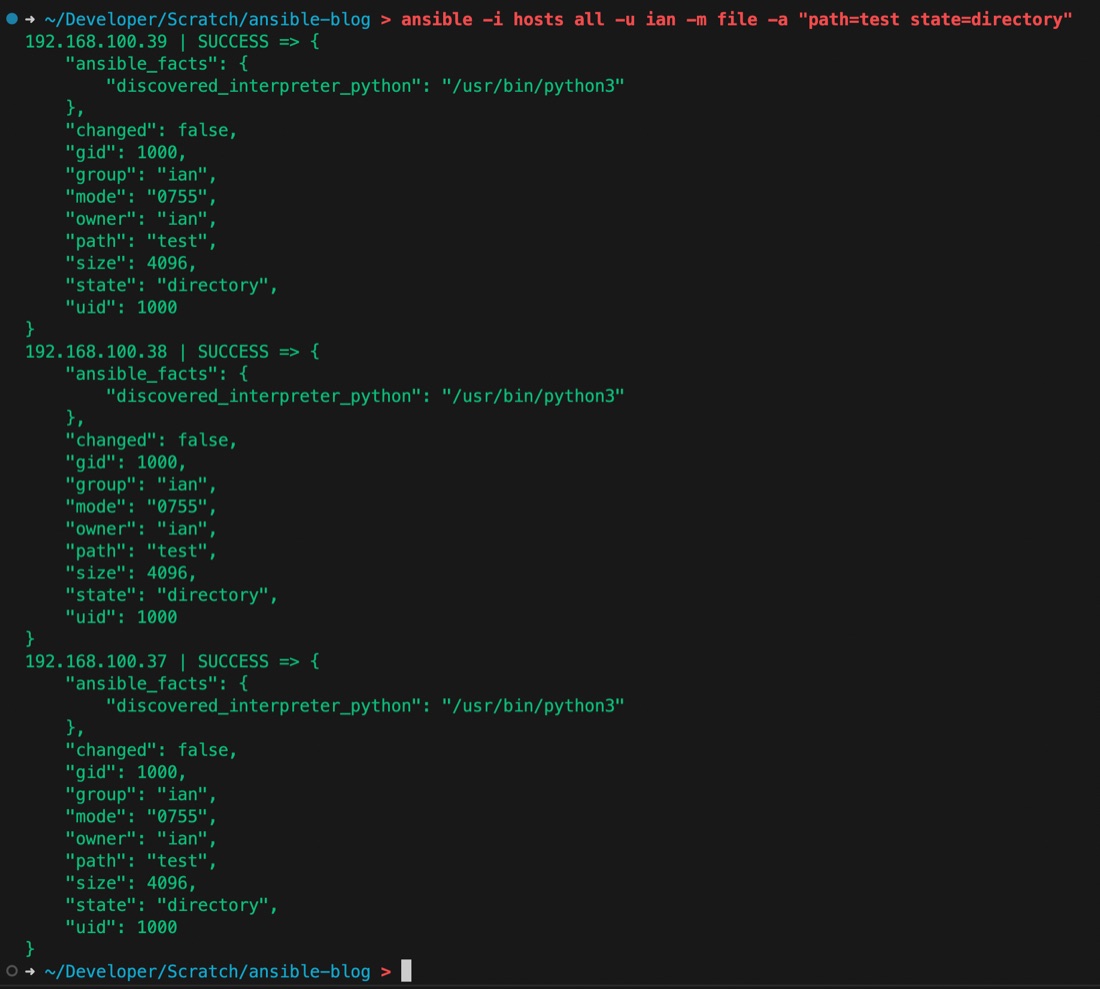
This time, since the directory is there, there’s no need to change it. Ansible checks for the directories existence before it bothers to create it - because it is idempotent.
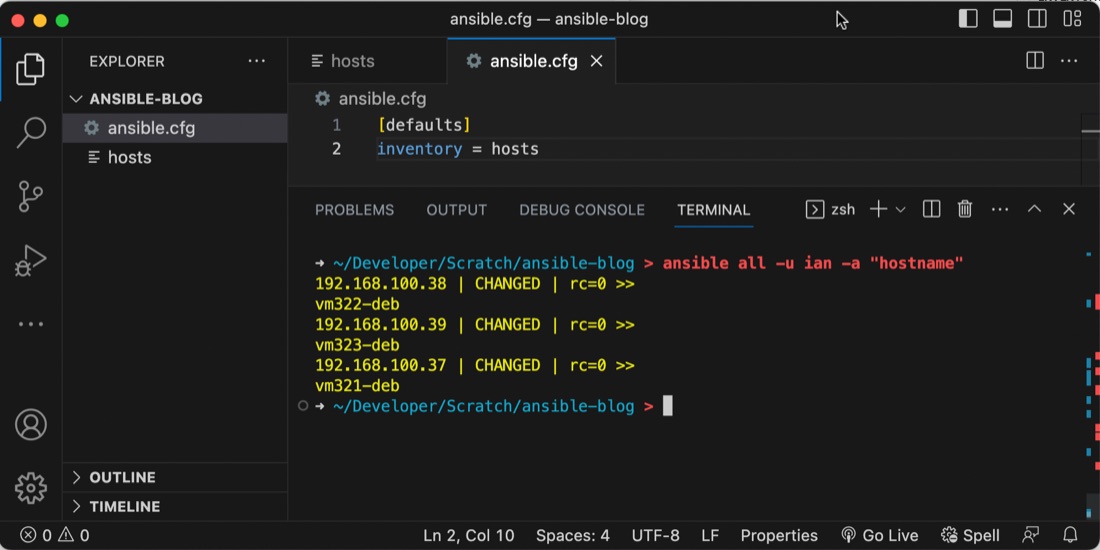
ansible.cfg
I’m getting a bit sick of this long command. We can move the inventory file name to a config file to save the typing. Create an ansible.cfg file in your working directory like this.
[defaults]
inventory = hosts
Now we can eliminate that from our command line input.
I’d also like to get rid of the -u ian from each command. That’s not stored in the .cfg file. Since it’s likely that your nodes will have different user names in a real situation, they can be stored in the inventory file.
Inventory file
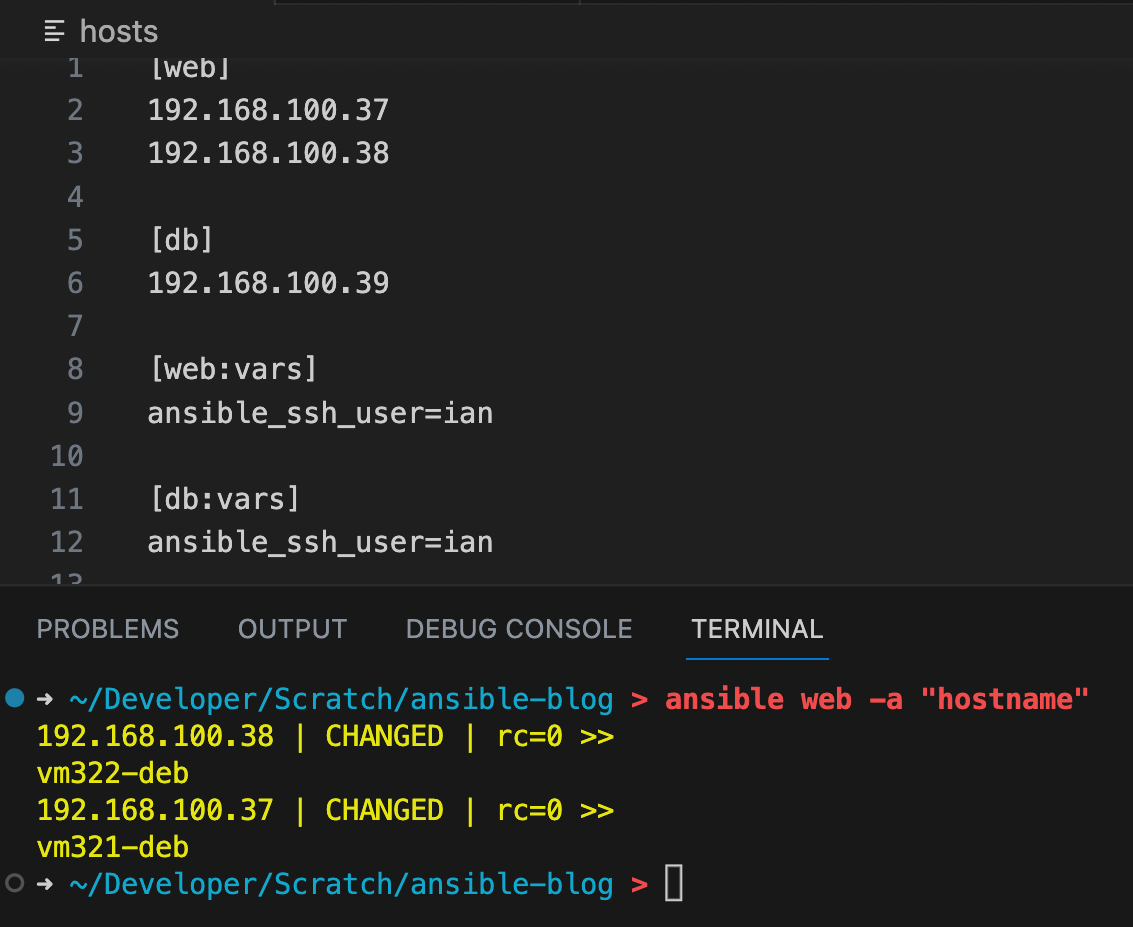
We started off with a very simple inventory file - literally just a list of IP addresses. let’s revisit that to add the ssh user, and while we’re there, we can group the nodes according to their functions - this will come in handy later.
[web]
192.168.100.37
192.168.100.38

[db]
192.168.100.39

[web:vars]
ansible_ssh_user=ian

[db:vars]
ansible_ssh_user=ian
Here I’ve created two groups for my nodes, a web group and a db group. I’ve also set the ssh_user for each group. Now that argument can be left out of out commands. So to get the hostnames now, we can just say:
ansible all -a "hostname"
So much neater! Additionally, since our nodes are in groups now, we can specify the group if we don’t want to execute the command on all nodes.
That’s probably as far as I want to go in this post. We’ve got our heads around some early Ansible concepts, learned how to use the Ad-Hoc commands to do things to our nodes, learned a big word that won’t ever come up again except in coding interviews, and seen how to set up the ansible.cfg and inventory files.
The real power to be unleashed is using Ansible playbooks. We’ll look at them next.