How to install M.2 SSD in HP G2 800 Mini
28 Aug 2023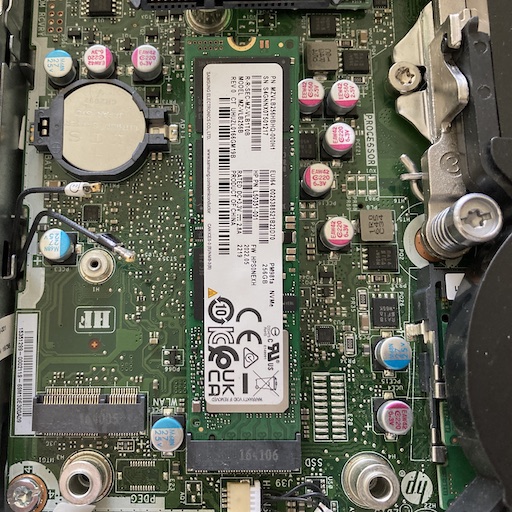
As part of my strategy to not worry about the slightly dodgy SMART reporting on the SDD’s in my HP Elitedesk G2 800 Mini Proxmox nodes, I’d decided to make use of the full sized M.2 slot to install 256GB NVME drives. That way I can boot from those, and have the SSD’s running ZFS which allows scrubbing to check the integrity of all the data. My VM disks can live on this drive.
The G2 800 Mini has two M.2 slots, a 2230 (M.2 sizes are wwll where ww is width in mm, and ll is length in mm) for the wireless/bluetooth adaptor and a 2280 for storage. These slots are under the SSD drive cage.
Steps
- Undo the large finger-operable screw on the back of the case, then slide the case off in the direction of the front of the unit.
- Unplug the drive SATA connector

- At the right side of the SSD (when the machine is orientated per the photo above) is a lever that can be pushed a little to the right to allow the drive to slide back and be lifted out.
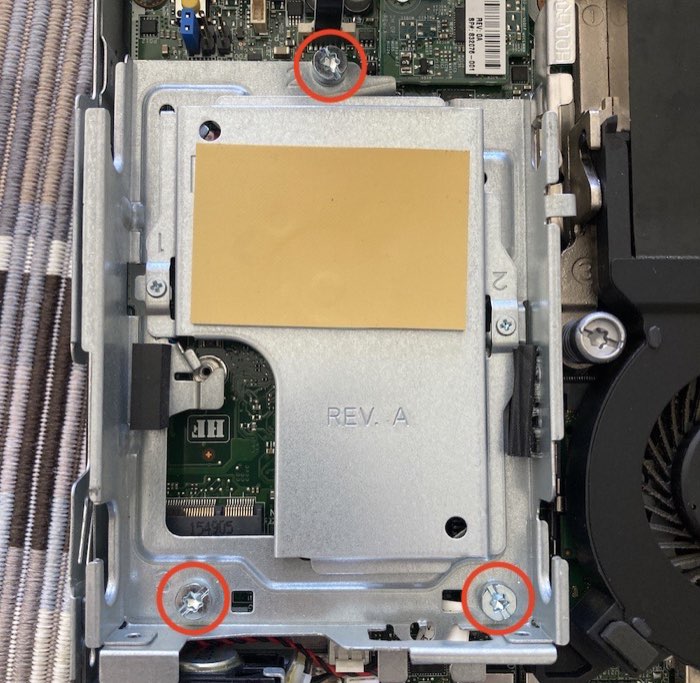
- There’s three giant screws holding the drive cage in numbered 1, 2 & 3. There’s also several smaller screws with numbers - ignore them. The ones you are looking for have a torx in the middle, but also a slot for an ordinary flat blade screwdriver. If you can only find two, that’s probably because the drive’s SATA connector is covering it up.
- Once the drive cage is removed and set aside, you’ll be able to see the two M.2 slots. The NVME drive slots in like SODIMM memory - sort of sprung up on the end away from the connector. I didn’t like the look of those lose wires - but I assume they are for the wifi or bluetooth antennas.
- Wriggle it in, then push the end down and secure it with the little M.2 screws. You did remember to order those screws , right? My $20 Samsung PM981a 256GB drives didn’t come with any, but perhaps fancy ones do.
- Then, as 1970 Greggory’s workshop manuals used to say, “Assembly is the reverse of the disassembly steps with attention to the following:”. In this case, the attention would be towards being gentle with that SSD ribbon connector.