Installing SSL Certificates with Nginx on Docker
29 Apr 2023
When you’ve successfully got Nginx running in a Docker container, AND got your domain correctly pointing at your nascent website, you’re then going to want to set it up for encrypted, and therefore trusted, browsing with SSL.
Certificates
A couple of posts ago, I mentioned that it was simpler to let Porkbun be the authoritative nameserver for a domain. Part of the reason for that is that if we do that, Porkbun had a button you can press which connects to LetsEncrypt and generates the certificates for you. This usually takes an hour or so, then you’ll be able to download the bundle from that same page.
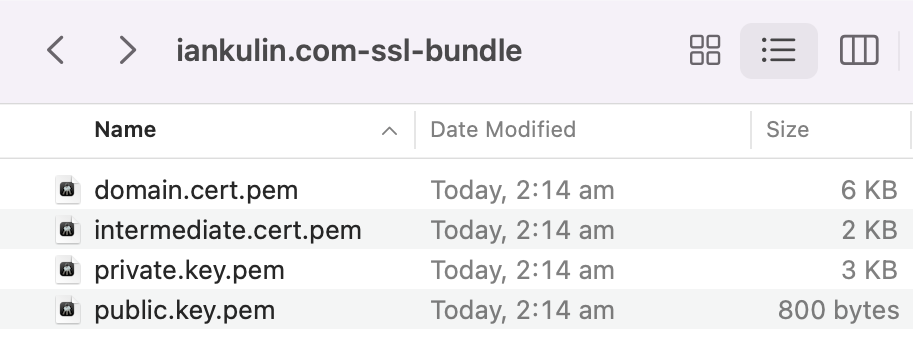
In order for the SSL to work, we’re going to have to make a couple of files available to Nginx - fullchain.pem and private.key.pem. So there’s our first gotcha - we don’t have a fullchain.pem, so we have to build it. To do this, we just combine the domain certificate and the intermediate certificate. On the mac, I did this:
cat domain.cert.pem intermediate.cert.pem > fullchain.pem
This is me solving the first gotcha, while simultaneously creating the second. Much later in the process when Nginx was failing at startup, I looked in the logs (with the handy docker logs command) and saw these messages:
2023/04/21 05:42:45 [emerg] 1#1: cannot load certificate "/etc/nginx/conf.d/fullchain.pem": PEM_read_bio_X509() failed (SSL: error:0908F066:PEM routines:get_header_and_data:bad end line)
nginx: [emerg] cannot load certificate "/etc/nginx/conf.d/fullchain.pem": PEM_read_bio_X509() failed (SSL: error:0908F066:PEM routines:get_header_and_data:bad end line)
That’s a reasonably descriptive error - let’s look in the fullchain.pem file (it’s just text like an SSH key file) and see if there’s anything suspicious.
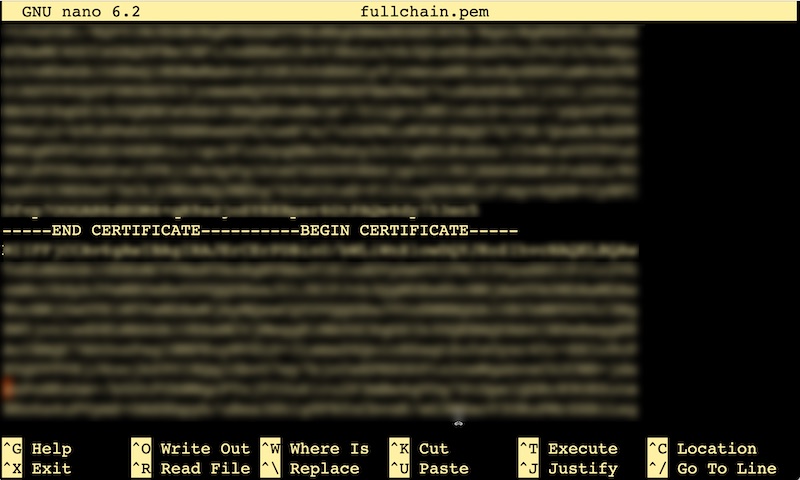
Well there’s a problem. These beginning and ends should be on their own lines - I probably could have done that when I concatenated them, but no problem, it’s easily fixed in the text editor by counting in five dashes and hitting enter.
Nginx Docker
In order to have the certificates work with Nginx, we’re going to need to add them to the a config file. There’s also a couple of gotcha’s in that process.
If you’re as new to running Nginx in a container as I am, you might have been starting it up with a command like:
docker run -p 80:80 -d -v ~/www:/usr/share/nginx/html nginx
That’s fine and all, but as your system gets a bit more complex (which it’s about to) this will quickly become unmanageable. It’s time to put your big person pants on and embrace the wonders of docker compose. There are many resources for learning this, but the short version is that all of that information you’ve got in your command line can be stored in a human readable YAML file. If you’re smart it will also be in version control and you’re on your journey to automating your infrastructure as code.
Below is my docker-compose.yaml file for Nginx. Note that these files are always called that, so you keep the compose files for different containers in separate directories.
version: "3.9"

services:
    client:
        image: nginx
        container_name: nginx
        ports:
            - 80:80
            - 443:443
        volumes:
            - /home/ian/iankulin.com/www:/usr/share/nginx/html
            - /home/ian/iankulin.com/nginx/conf/:/etc/nginx/conf.d/:ro
        restart: always
version- just the compose yaml version docker should use to read this fileservices/client- it’s possible to combine several programs (clients) in a docker container. We’re not doing that todayimage- the name of the docker image we’re pulling down from docker hub . We could also add the version here if we were picky, if one’s not specified, it assumes ’latest'container_name- nice name for our container - it’s possible to run several versions of the same image so you may want to name them something different. If you miss this off, docker will make up a default name likeagressive_einsteinand you’ll constantly be runningdocker psbecause you can’t remember the nameports- the underlying idea of containers is that they are mostly immutable inside, but of course to be useful they need to have some access to the outside world. This ports declaration is doing just that. These two lines are saying port 80 outside the container is connected to port 80 inside the container. If we wanted Nginx running on port 8080 we’d say8080:80ie the outside first, and the inside secondvolumes- similar to ports, we’re joining a directory of our file system in outside world to a directory inside the container. In the first one, Nginx is going to look for files to serve inside the container at/usr/share/nginx/htmlbut where we want it to look for html files to serve is actually out here in the real filesystem world. Same as with the ports, the format is real world first, inside the container second. Same with the config directory. You might be wondering how I know what the paths inside the container are for these things - you just have to figure it out from the documentation .- So we’ve got two outside world locations - our html files in
/home/ian/iankulin.com/wwwand the Nginx config files in/home/ian/iankulin.com/nginx/conf/.
Let’s have a look at the config file. This is stored in /home/ian/iankulin.com/nginx/conf/.
server {
    listen 80 default_server;
    listen [::]:80 default_server;
    root /usr/share/nginx/html;
    server_name iankulin.com www.iankulin.com;

    listen 443 ssl;

    # RSA certificate
    ssl_certificate /etc/nginx/conf.d/fullchain.pem;
    ssl_certificate_key /etc/nginx/conf.d/private.key.pem;
}
This is mostly pretty decodable just by looking at it, but there’s a couple of things worth noting.
- the root for the html, like all of the paths in this file, are the paths inside the container. Don’t get confused. To the programs running inside the container, everything looks like it’s inside the container. This config file is being consumed by the Nginx program inside the container, so the paths have to be inside-the-container paths.
- Following that logic, I’ve actually stored the SSL certificates at
/home/ian/iankulin.com/nginx/conf/but to Nginx inside the container, they look like they’re at/etc/nginx/conf.d/ - There is way more stuff you can do in this config file. This is just the simplest version possible to make things work.
So now that’s in place, and I’ve got a skeleton of an index.html file stored at /home/ian/iankulin.com/www I just enter sudo docker compose up -d in the directory where my docker-compose.yaml file is, and I should be able to navigate to http**s**://iankulin.com and get a webpage with a padlock in the corner.
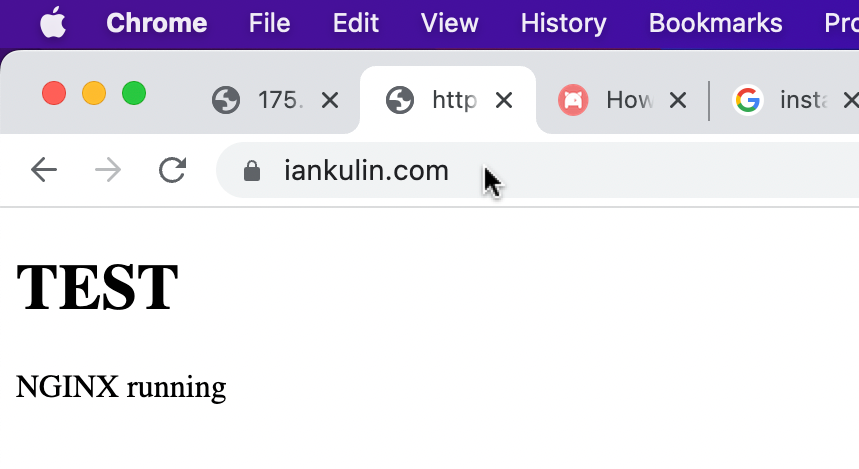
Success
Well of sorts. We have obtained our certificates, and installed them in the webserver, but certificates like these only last 90 days. In 75 days I can obtain new certificates and copy them over the old ones. If we fail to do that by the 90th day, visitors to the website will get a scary message saying the website might not be who it says it is, and users will have to click around a bit to ignore it. You will have almost certainly seen this message as it’s a reasonably common problem.
It’s a problem calling out for an automated solution, of which there is one that we’ll install on another day. Probably the day I come back to this server and discover the certificates have expired…