New Self-Hosted Service Workflow
3 Dec 2023
I’ve developed a bit of a workflow for setting up a new service of some type on the homelab. Installing it is the obvious thing, but I also have a few quality of life things I do to make it a full production-quality part of my installation. I thought it might be helpful to run through those things using a recent example of adding audiobookshelf .
audiobookshelf
audiobookshelf is a web based system for viewing, playing, downloading and/or generally managing your audio books. I’ve been an Audible user/subscriber, but recently got grumpy at them about something - I think I had paused my subscription, and my downloaded books were still available on my phone. I was halfway through one, upgraded the app, and then wasn’t able to play the book without re-subscribing. That might not be exactly right, but it was some type of frustrating carry on like that.
In any case, that made me decide I couldn’t trust them, and it was time to reassert my digital sovereignty by downloading the books I’d paid for (and the ones they’d given me), removing the DRM , and hosting it myself. The first two steps of that process were easily carried out with a brilliant bit of software called OpenAudible .
Do it on dev
Since I have the luxury of having separate production and development servers, I generally play around with new things I’m trying out on the dev instance of Proxmox. Note that this is almost entirely unnecessary - since everything is virtualised in Proxmox on the production server, there’s hardly any damage I could cause in one VM or container that would adversely affect anything else.
Nevertheless, whether it’s caution, or a need to justify the size of the homelab, I always start building new things on the dev server. Once it’s all working perfectly, it’s a simple matter (that we’ll get to later) to move it as-is to the production server.
Installation Stack
My default setup now is a Docker container, inside an LXC container on Proxmox. Although this originally felt like a comical number of levels of abstraction, each layer is doing something for me, and now it just feels like the cost of doing business.
- Proxmox - virtualising everything insulates services from each other, makes moving them around easier, backing them up and restoring them trivial, and provides a level of high availability.
- LXC - lighter than a full VM, more VM like than Docker, and quicker to play with. Does add a bit of complexity we’ll get to later.
- Docker - OCI compliant containers are the bomb. This is how we do software now. I pushed back as long as I could but the logic is too strong. There are problems still to solve around SBOM , but the reduction in the work of managing installations is compelling.
I create a non-root user, and the docker-compose.yml and the directories for any config or data all go in that user’s home directory. I don’t prefer Docker volumes for the data any more since the downsides annoy me and the upsides must be in order to solve problems I haven’t encountered yet.
Since there are a few little gotchas using LXC, when I’m trying something for the very first time, and I’m not even sure if it’s going to end up being used, I’ll do it in an VM first. I have a bunch of VM’s on the dev machine in varying states, so I normally pick one of them that already had Docker installed. This also gives me an idea for the amount of RAM and disk space the container is going to need. Changing the memory size once it’s in production is no biggie, but expanding the disk space is a bit of stuffing around.
When I’m ready to make the container, it’s always the latest Debian stable, unprivileged, nesting turned on. Very few web services require more than 1GB RAM, and I guess the disk usage from the earlier trials then add a bit. I have lots of disk space and CPU time - it’s usually memory that’s the first bottleneck you’ll run into on little homelab servers. I’m sure I’ve heard Jim Salter and Allan Jude recommend that you should keep the VM memory low to leave more for the host so the it can effectively cache for all the guests.
I always use docker-compose. Too many times I’ve wanted to upgrade a container, and have to waste time figuring out what the run command was. The compose file is good documentation for where your data is as well if you are, like me, avoiding volumes.
The Steps
Some installs
With the fresh LXC created (latest Debian stable, unprivileged, nesting turned on), and started, I use the Proxmox console to log in, do some apt updates, use adduser to add my user, apt install sudo and then usermod to add my user to the sudo group.
I then switch to a real terminal and ssh in as that user to install Docker. While that’s happening, I log into my router and reserve the IP address for the new container. This will follow when I move the container to the production server since it takes it’s MAC address with it.
My pattern for SSH keys, which might not be the most secure, is that I have a key per device. So there’s one from my laptop, one for the terminal on my phone, and one for a VM that I sometimes use as an entry point to my home network via Tailnet. My theory with all this is that if any of those devices are compromised (for example my laptop is stolen) I can revoke that key from each of my services.
NAS Mount
Often the service I’m installing needs access to the NAS - and that’s the case for audibookshelf which obviously needs access to my collection of audio books on my four bay Synology. I use an /etc/fstab entry to mount the folder I’m interested in. I’ve set up the NAS to share these over SMB. The entry for audiobookshelf looks like this:
//192.168.100.32/media/books/audio/ /mnt/media cifs username=abs_user,password=SeCrErpaSSword,file_mode=0660,dir_mode=07
There’s a bit going on here, let’s pull it apart:
//192.168.100.32/media/books/audio/
- The directory on the NAS where my audiobooks are stored. I’ve been a bit slack here. It would have been better for that directory to have been it’s own share to reduce the attack surface.
/mnt/media
- the directory in the LXC container that we’re mounting the books to. If I could go back in time to when I started by Linux & self-hosting journey, I would not have used the word media, since in Linux that more refers to things like USB drives and less like entertainment to consume. Naming things is hard .
cifs
- The protocol being used for the share. I’ve got this shared folder set up as SMB, so I use CIFS. Some of my shares are NFS, so you could have
nfsat this position in the entry.
username=abs_user,password=SeCrErpaSSword
- It seems bad to have these credentials in /etc/fstab where any user on this system can read them, but I am the only user on this system and I don’t know what other convenient way I could get around this.
file_mode=0660
- Read/write for user and group
dir_mode=07
- Read/write/execute on directories for user & group
Once that’s in the /etc/fstab, you need to mount it with a mount -a, then you should see the share by ls-ing the mount point.
Docker compose
Obviously this will vary with whatever service you’re running. Here’s mine for audiobookshare.
version: '3'

services:
  audiobookshelf:
    image: ghcr.io/advplyr/audiobookshelf
    container_name: audiobookshelf
    ports:
      - "80:80"
    volumes:
      - ./config:/config
      - ./metadata:/metadata
      - /mnt/media:/audiobooks
    restart: always
The notable things here are that I store all the container data - in this case /config and /metadata in subdirectories from the current directory, which is actually the user’s home directory. This LXC container is only for running this single service, so as soon as I ssh in, everything I need to know or find out is easily discoverable, and easily accessible if I want to scp it without a convoluted path.
Another benefit of running in individual LXC’s is that each service has its own IP address - so I can use port 80 for every service.
Tailscale
Now that we can have up to 100 Tailscales on the free tier, every real service gets one. For the install, I just follow the Debian Tailscale installation instructions since I’m using a Debian LXC. And now when we try tailscale up we run into the LXC problem. I’ve already documented how to overcome that in an earlier post .
The combination of using Tailscale, and having access to port 80 means that the web address for this service will just be whatever hostname I gave it, in this case http://ct327-audiobookshelf
Ansible
Some of the next steps are so common, I’ve set up Ansible playbooks for them, but to allow me to apply them to the new server, they need to be added into my Ansible infrastructure. First the hosts file where they get a host entry and some variables.
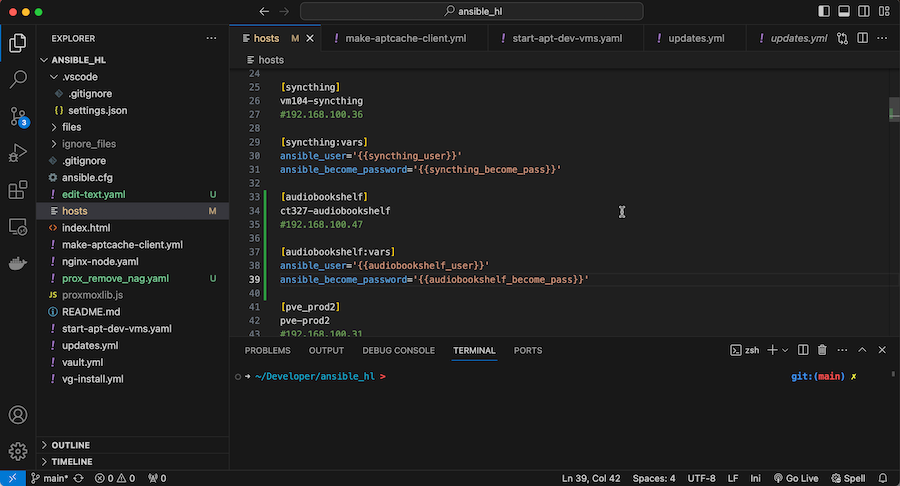
Then in the encrypted vault.yml file for the secrets. I’ve written about these before here and here . Since I have hosts:all in the playbook that runs all my apt updates , this now means the LXC container will get all it’s updates.
Now we can automate some tasks:
- Make this server use our
apt-cacheserver to make updates a bit faster and efficient. Described here . - Install a little endpoint so the available memory and disk space can be monitored.
Once that endpoint is installed, I can add a couple of entries to my Uptime Kuma instance to keep track of the server health and notify me with ntfy - so that’s monitoring covered off.
Backups
Backups in Proxmox are easy. I already have a general backup job set up for the prod DataCenter - it just snapshots every VM and LXC to the NAS at 1:00am each day. That’s plenty for this service - the only thing that would get lost would be a day’s worth of metadata, most of which is automatically pulled from web services anyway.
This backup is of the LXC container with all the audiobookshelf config and code - not my book library. There is a backup process for it that’s a complicated collection of and external USB drive and rsync-ing to a remote that might be a story for another day.
Done
And that’s it. Now my audiobookshelf is running in an LXC container, serving the books off my NAS. The service is monitored for health, and there’s a backup plan in place. I can kick back and catch up on some technical reading.