Proxmox tags to solve a problem
2 Nov 2023![]()
Each weekend I run an Ansible script that updates all my apt based VMs and containers. For the production machines, that’s everything, but my dev Proxmox is full of half-finished projects. Some of these have IP addresses reserved and are in the Ansible hosts file (because whatever service they are running is almost ready to move to the production server) others do not.
Long story short, the dev server has some containers and VM’s that need turned on before I run the updates, and some that don’t. I could just start them all up, for the ten minutes the updates usually take, but that seems wasteful somehow. If there was only some way to mark the ones I need to turn on in the Proxmox webgui! Well, there is. We can add tags to machines in Proxmox.
Proxmox has quite a comprehensive tagging system - there are different display formats, and tags can be limited to a specific set, or completely free form. Also, there’s a heap of command line tools to work with them. For this job, I don’t really need much of that stuff - I just want to click a few things in the web gui to mark some of my VM’s with a coloured marker so I know which ones to start when I’m going to run my updates.
Here’s the steps.
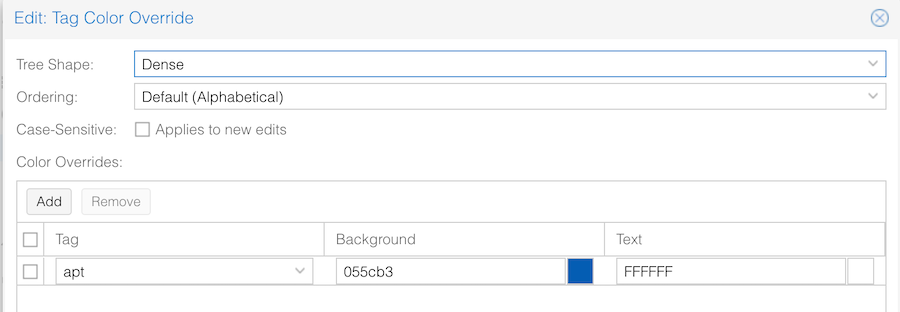
Go into DataCenter | Options. One of the options is Tag Style Override. It’s called “Override” because by default, the colours are deterministically figured out from the tag text. I want to just have a nice dark blue associated with the tag apt, so I’m going to set it. It turns out I could have just skipped this step and got a nice light blue for apt. This system (of just figuring out a colour from the text) means in most cases you can completely skip this step. Each machine you tag with a particular tag will be marked with the same colour - it will just work. test = pink, fred = green, and so on.
Back to me being fussy. Opening up the Tag Style Override I’m setting apt to be dark blue with white text.
To apply these tags, you just click on the machine you want to tag, then notice that up the top of the web gui, next to the machine name, it says “No Tags”
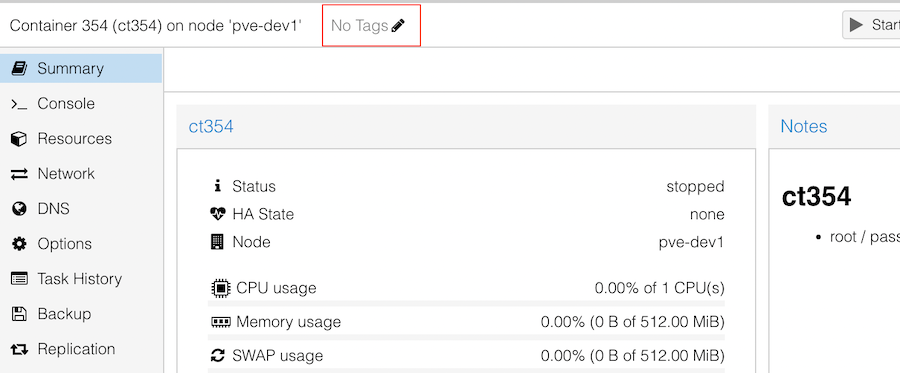
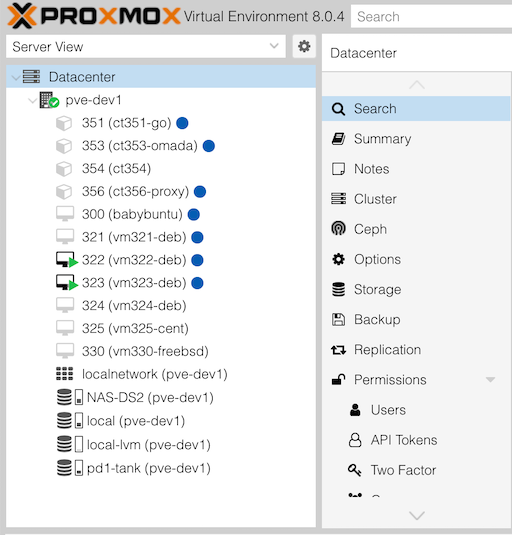
You just click on the pencil, and enter the tag name. If you haven’t changed any of the other defaults, a coloured circle will appear next to the machine in the server view.
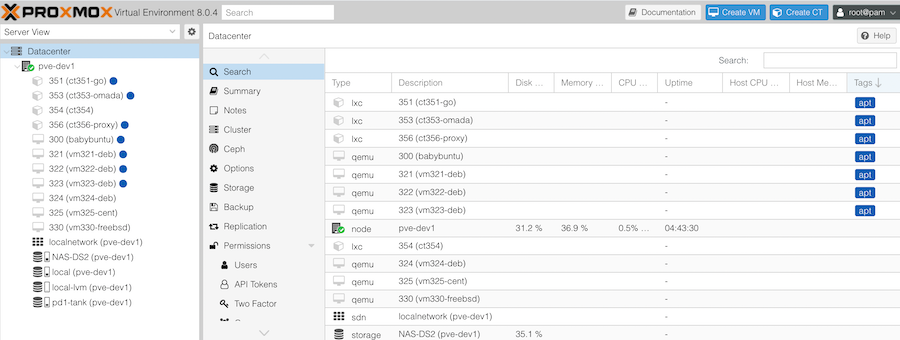
There are three display options for the tags - “full” which is a coloured bar including the text of the tag, “circle” which is the one shown in the first screenshot above, and “dense” which is a small rectangular bar - designed for stacking several different tags against each machine. All these options are under “tree shape” in the Tag Color Override dialogue we opened earlier.
As well as being able to see the tag blobs in the tree view, if you look at all your machines on the Datacenter | Search view, it’s possible to sort by tags - which will even further simplify the job for me of starting them all up before I run the updates.