SSH with Keys to Synology
27 Mar 2023
The Synology operating system DSM (I’m on DSM 7.1.1) is Linux, but its highly customised for the purpose of making running a complicated Linux NAS doable for less technical users.
Due to that, some things that are routine in a regular distro, require a few more steps to jump through to get them to work. SSH-ing in to a Synology with keys is one of those things.
Should you?
Before you do start fiddling around, it’s probably worth mentioning that almost all the things you might want to do on the Synology can be accomplished through their web interface, or by installing a ‘package’ from the Package Center. For example, if you need to run a cron job, that’s done through the Control Panel ‘Task Scheduler’. If you need TailScale installed to easily access it over Wireguard, there’s a TailScale package. In general it’s probably easier and safer to do things their way.
Enabling SSH
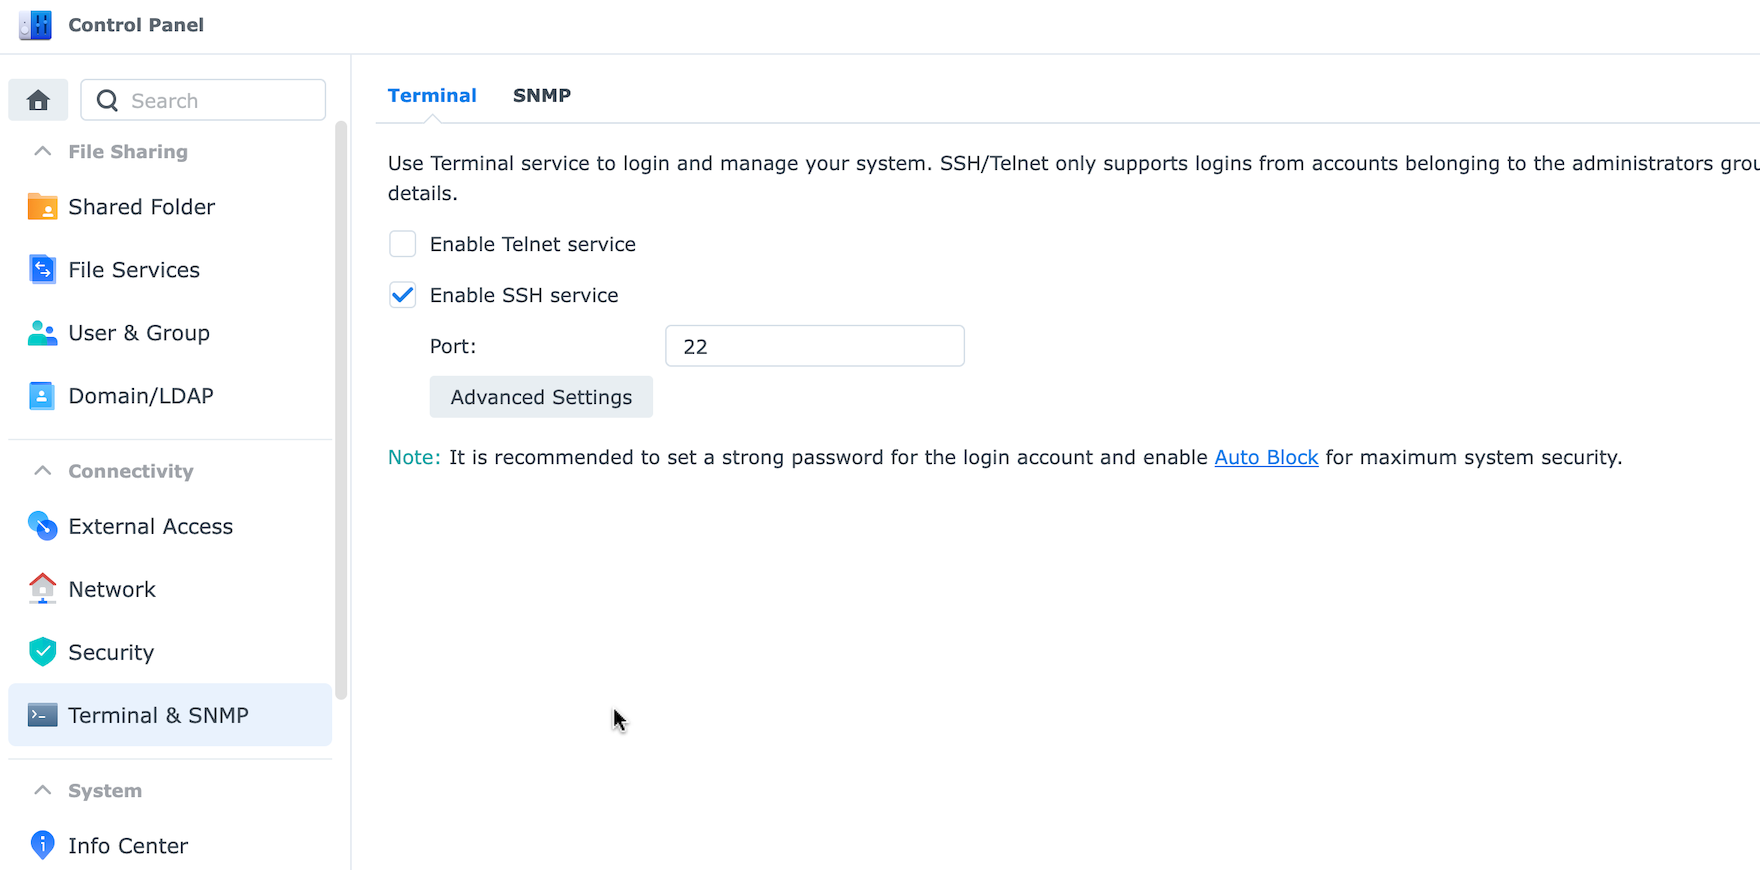
Before you can SSH into the Synology, you need to enable the SSH service. This is straightforward with the web interface. In Control Panel, look for Terminal & SMNP and tick the box, and click Apply.
Home directory
If you SSH to the Synology now, it works, but you’ll notice that there’s a warning message saying “Could not chdir to home directory /var/services/homes/

The reason for this is that unlike most distros, when you create a user in DSM, there’s no home directory created for them. There must be some bash config somewhere since I get that nice prompt, but no user home directory.
Lot’s of times, you could just ignore that warning, you can still probably do what you wanted to, but it is going to be an issue for installing SSH keys - when you do the ssh-copy-id it will want to create a .ssh file in the user’s home directory, and if they haven’t got one, that is not going to work. You’ll get a similar sort of error saying something like
sh: line 0: cd: /var/services/homes/<user_name>: No such file or directory mkdir: cannot create directory '.ssh': Permission denied
Again, there’s a setting in the web interface to create home directories for the users. We’re in the Control Panel again, but this time look for User & Group.
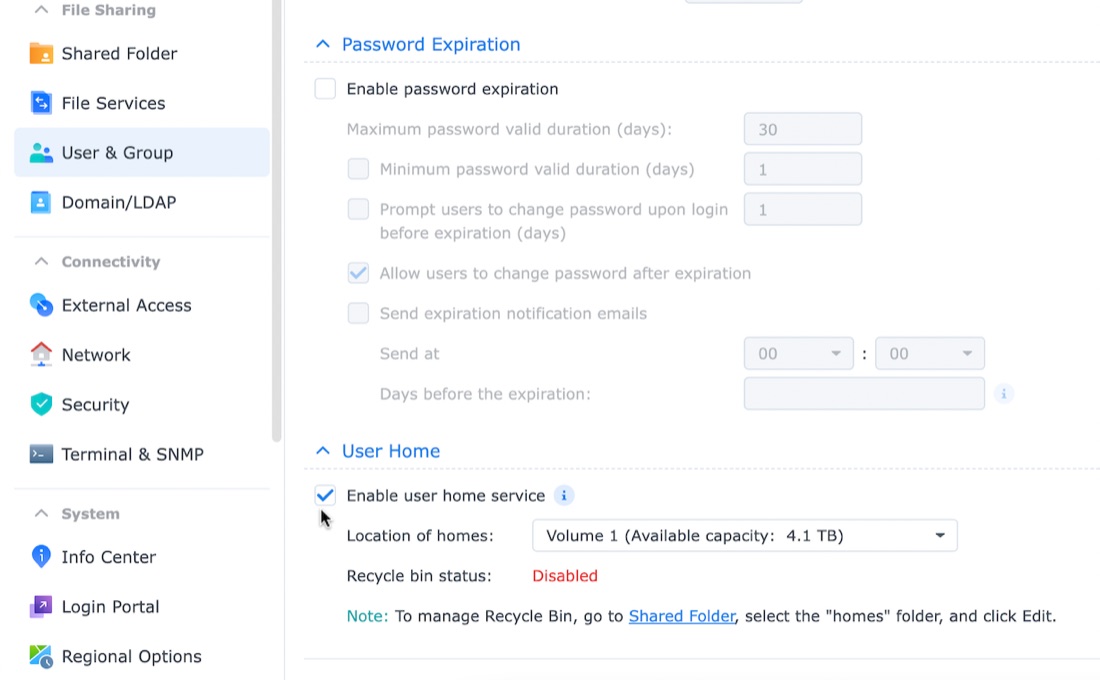
Tick the box for Enable user home service, and hit Apply.
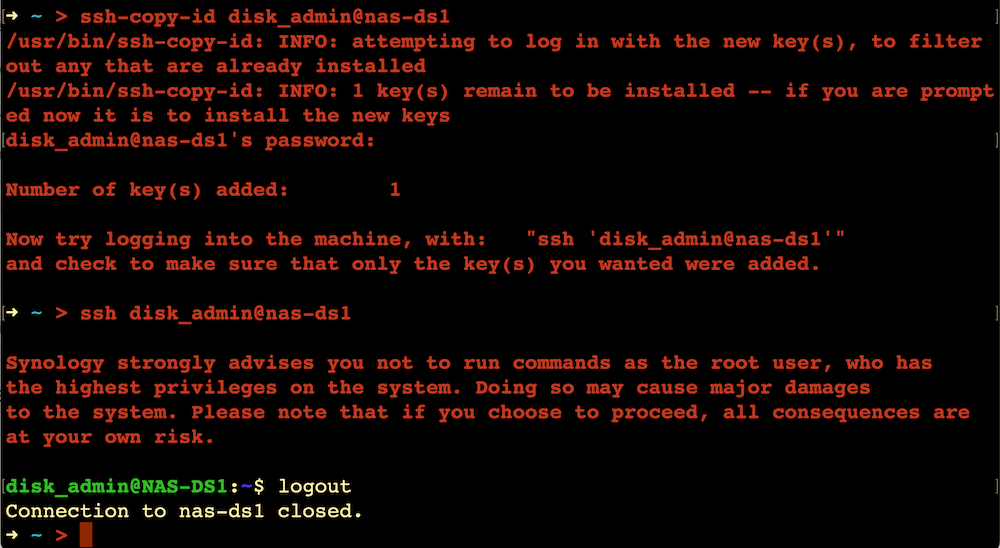
Now you’ll be able to copy the keys as usual with ssh-copy-id.